- Home
- Learn about salinity
- Get to know your site
- Design a landscape
- Solve a problem
- Other information
Salinity Management Guide
Assessing the chemistry of soil
How to collect a sample of soil
Careful sampling of soil is necessary for accurate analyses. The process involves the following:
-
Find an analytical laboratory that conducts horticultural or agricultural testing of soil. As mentioned earlier, you can begin by consulting the Yellow Pages of your telephone directory or contacting a horticultural specialist with the University of California Cooperative Extension (http://ucanr.org/).
Different laboratories conduct different types and ranges of tests, so contact several laboratories and find out what they do before choosing a particular one.
Contact the laboratory of your choice before going out in the field. The laboratory's staff will provide relevant forms and instructions. They may also furnish guidelines about sampling and bags for collecting samples.
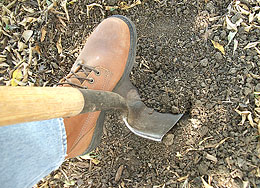
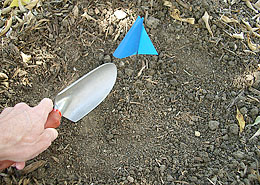
- Locate one or more clean and rust-free tools to use for sampling: a shovel, an auger, a soil-sampling tube, a post-hole digger, a trowel. Avoid using galvanized or brass equipment, which might contaminate samples with lead or other metals.
If the laboratory doesn't provide bags for sampling, then also locate clean paper or plastic bags before you go out in the field.
Pack up all hand tools, containers for samples, labels, pens and pencils, gloves, and any other needed items. A large plastic cooler can be used to carry everything. Making a list before you pack and then checking the list twice is a good idea, to make sure you don't forget anything.
If you expect you'll need to dig a rather broad hole more than three or four feet deep, consider hiring a backhoe operator to do the excavation for you. The backhoe is also useful if some of the soils at your site are rocky and difficult to dig by hand.
- Collect samples from each area that differs in the type of soil, as indicated by color or texture, and from each area that differs in topography. Even within a relatively small landscape, different types of soil may have rather different salinities. Also, variations in topography can cause rather marked variations in the drainage of water and, therefore, in the salinity of soil.
-
To test for salinity, sample from the depth of soil that includes the roots of plants. To decide how deep you'll need to go, dig an exploratory hole close to where you will be sampling. If a plant has yet to be included in a landscape, bear in mind the depth of its mature roots when sampling the particular spot where the plant is likely to be placed.
You'll usually sample from a depth of 1 to 6 inches, so make your exploratory hole similar to that unless you know you will need to go deeper.
- Clear the surface of the soil of any debris, such as leaves and mulch. Typically, you'll be discarding the top 1/2 inch. Then collect three to six sub-samples of soil from the same spot. The sub-samples should be of the same or very similar composition. Combine the sub-samples by placing them into the same sample bag. About one pint of soil per sampled area is usually needed.
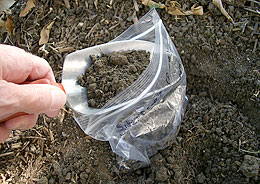
Label the outside of the bag. Information to note may include the number of the sample, the date, the location, the depth, any nearby species of plants, and the name of the person who collected the sample.
- Check the laboratory's instruction sheets for specific recommendations regarding preparation and delivery of samples. Unless they say otherwise, it's often useful to air-dry each of your composite samples within 12 hours of collection. This helps to prevent microbes from mineralizing organic matter in the sample, which can result in an inaccurate analysis.
- If you decide to air-dry your samples, work on a clean, dry surface. Pour out one of the composite samples and thoroughly mix together the material. Prepare the other samples in the same way, each on its own clean, dry surface, away from wind and water.
After each sample appears to be thoroughly dry, typically 8 to 36 hours, return it to its bag. Deliver the samples to the lab as soon as possible.
- When you arrive at the laboratory, verify that what you want measured will be included in the analysis. A laboratory's routine panel of tests for soil may, or may not, cover those aspects you need.
| « Previous page | Next page » |